Add the Project Team to the Project Home Page
Objective
To manage the project team on the project's Home page.
Background
On a project's Home page, the 'Project Team' area lets you create an informational listing of key project team members. Because many of your Procore users are not provided with read access to your Company or Project level Directory for security reasons, its helpful to create the 'Project Team' list on the project Home page to keep your Procore users apprised of which people and companies are responsible for performing key project roles.
Before you can populate the 'Project Team' area with contact information, a user with 'Admin' level permission to the Company Admin tool must first add a list of custom project roles (see What are custom project roles? and Add Custom Project Roles). A user with 'Admin' level permission to the Project Directory should ensure that all the required people and companies have been added to the Project Directory (see Add a Company to the Project Directory or Add a User Account to the Project Directory). After those two (2) prerequisites are complete, you can then use the steps below.
Things to Consider
- Required User Permissions:
- To create a project team from the project's Home page:
- 'Admin' level permissions on the project Home page and 'Admin' level permissions on the Project level Directory tool.
- To edit an existing project team from the project's Home page:
- 'Admin' level permissions on the project's Home page and 'Admin' level permissions on the Project level Directory tool.
OR - 'Read Only' level permissions or higher on the project's Home page and 'Read Only' or 'Standard' level permissions on the Project level Directory with the 'Assign Project Roles' granular permission enabled on your permission template.
- 'Admin' level permissions on the project's Home page and 'Admin' level permissions on the Project level Directory tool.
- To create a project team from the project's Home page:
- Additional Information:
- Users with the appropriate permissions on the Project level Directory can perform this task in the Project level Directory tool. See Configure the Project Team in the Project Directory.
Prerequisites
- The users or companies you want to add to the Project Team must exist in the Project Directory. See Add a Company to the Project Directory and Add a User Account to the Project Directory.
- You must create custom project roles in the Company Admin tool to be able to add members to the Project Team section of the Home tool. See Add Custom Project Roles.
Steps
- Navigate to the project's Home page.
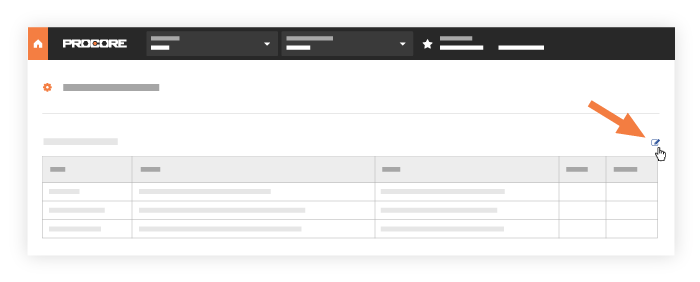
- Under 'Project Team', hover over the top corner of the page until the Edit icon appears.
Tip
Users without 'Admin' level permissions on the Project level Directory tool can only see the 'Project Team' table when one or more members have already been added to the project team. - Click Edit.

You are redirected to the Project Roles tab in the Project Directory Settings. - Click the drop-down menu under the 'Members' column for the project role you want to configure.
Tip
The 'Type' column for the project role indicates whether the project role is assignable to an individual person or to a company. The member options available for the project roles are based on their type. - Start typing in the drop-down menu to search the Project Directory or scroll through the list until you find the person or company that you want to assign to the project role.
- Click a person's or company's name to assign them to the project role.
- Optional:
- To add additional members to the project role, repeat steps 5 and 6.
- To remove an individual member from the project role, click the X next to their name.
- To remove all members from the project role, click the X at the end of the drop-down menu.
- Press ESC on your keyboard or click anywhere on your screen outside of the drop-down menu.
Your changes are saved automatically. The project role assignments will now appear on the project's Home page and will be available as filters in the company's Portfolio tool, depending on the settings configured for each project role.