Manage the Project Team Roles for the Project Home Page
PROJECT OVERVIEW REPLACES PROJECT HOME
nEw Version Available
The Project Overview has replaced the legacy Project Home page and is enabled by default. Learn more about the difference between the legacy Project Home page and the new Project Overview.
To return to the legacy Project Home, Company Administrators can navigate to the Company Portfolio / Procore Home tool, click Manage Settings and toggle Project Overview  OFF.
OFF.
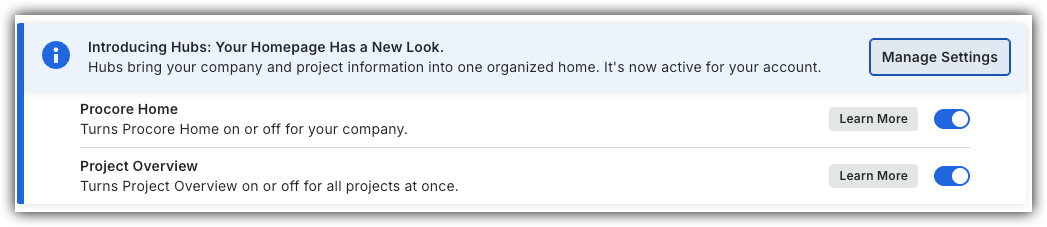
However, later this year it will be sunset and will no longer be available. If your company reverted to the legacy Project Home experience, Company Administrators can re-enable the Project Overview experience in Procore Explore. (US 2 | UK)
Background
The 'Project Team' area on the Home page provides a central list of key team members and their roles. This is especially useful for users who lack access to the Company or Project Directory for security reasons. To set this up, a Company Admin must first create custom project roles, and a Project Directory Admin must ensure all necessary people and companies are added to the directory. Once these two steps are complete, you can populate the list using the instructions below.
Things to Consider
-
Required User Permissions:
-
To create a project team from the project's Home page:
-
Admin' level permissions on the project Home page and 'Admin' level permissions on the Project level Directory tool.
-
-
To edit an existing project team from the project's Home page:
-
Admin' level permissions on the project's Home page and 'Admin' level permissions on the Project level Directory tool.
OR -
'Read Only' level permissions or higher on the project's Home page and 'Read Only' or 'Standard' level permissions on the Project level Directory with the 'Assign Project Roles' granular permission.
-
-
-
Additional Information:
-
Users with the appropriate permissions on the Project level Directory can perform this task in the Project level Directory tool. See Configure the Project Team in the Project Directory.
-
Steps
-
Navigate to the Project Overview.
-
Navigate to the project's Home to be redirected to the Project Overview.
-
Click Menu and select Project Overview.
-
-
In the 'Project Team' section, click the vertical ellipsis
 and select Edit Project Team.
-
Assign User Roles
-
For each of the roles, select a user from the drop-down menu. You can choose multiple users.
-
-
Remove Users from Roles
-
To clear a user, click the 'x' next to their name.
-
-
-
Changes are automatically saved.
project home legacy
- Navigate to the project's Home page.
- Under 'Project Team', hover over the top corner of the page and click Edit.
Tip
Users without 'Admin' level permissions on the Project level Directory tool can only see the 'Project Team' table when one or more members have already been added to the project team.
3. ln the 'Members' column, click the drop-down menu to select a person for each project role.
Tip
The 'Type' column for the project role indicates whether the project role is assignable to an individual person or to a company. The member options available for the project roles are based on their type.4. Press ESC on your keyboard or click anywhere on your screen outside of the drop-down menu to save.