Create a New Project
Objective
To add a new project to your company's Procore account using the Portfolio tool's Project Creation Assistant.
Background
The Project Creation Assistant gives you the ability to quickly create Procore projects and efficiently upload key project documents (e.g., project drawings and specifications).
Things to Consider
- Required User Permissions:
- 'Admin' level permissions on the Company level Directory tool.
OR - 'Read Only' or higher on the company's Portfolio tool with the privilege to create new projects. See Allow Users to Create New Projects.
- 'Admin' level permissions on the Company level Directory tool.
- Prerequisites:
- If your company is planning to use the Project level Bidding tool, complete the steps in Add Project Bid Types.
- If your company is planning to organize its projects in the company's Programs tool, complete the steps in Add Programs.
- If your company uses a classification system to organize your projects by type, complete the steps in Add a Custom Project Types.
- For companies using the
 ERP Integrations tool:
- Do NOT use the steps in this article. Refer the article for your integrated ERP system instead: Add a Procore Project to your ERP Software
- Limitations:
- Procore projects cannot be deleted. However, you can change its status of Inactive. For instructions, see Change a Project's Status to Active or Inactive.
- When your company's Procore account meets the limit defined by your account's Maximum # of Active Projects, the Create Project button is automatically disabled.
- Troubleshooting:
- If you are not able to create a new project, see Why am I unable to create or activate Procore projects?
Steps
Use the Project Creation Assistant to add a new project. These are the steps:
- Launch the Project Creation Assistant
- Add Project Details
- Add and Remove Tools in the Project Toolbox
- Add Project Cost Codes
- Update Directory
- Upload Drawings
- Upload Specifications
- Upload Schedule
Launch the Project Creation Assistant
- Navigate to the company's Portfolio tool.
- Click Create Project.
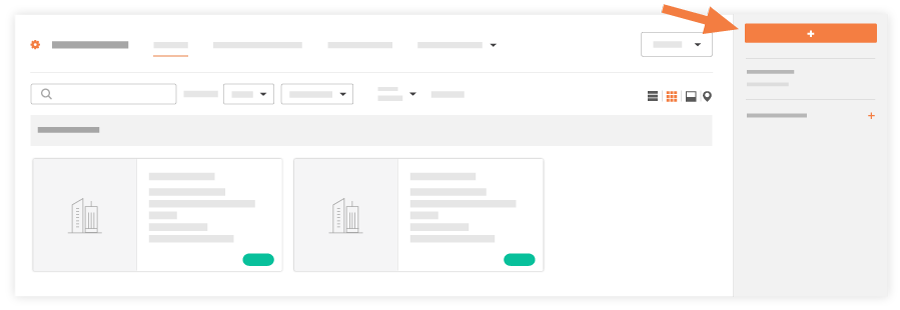
This launches the Project Creation Assistant.
Add Project Details
- Make sure Project Details is selected.
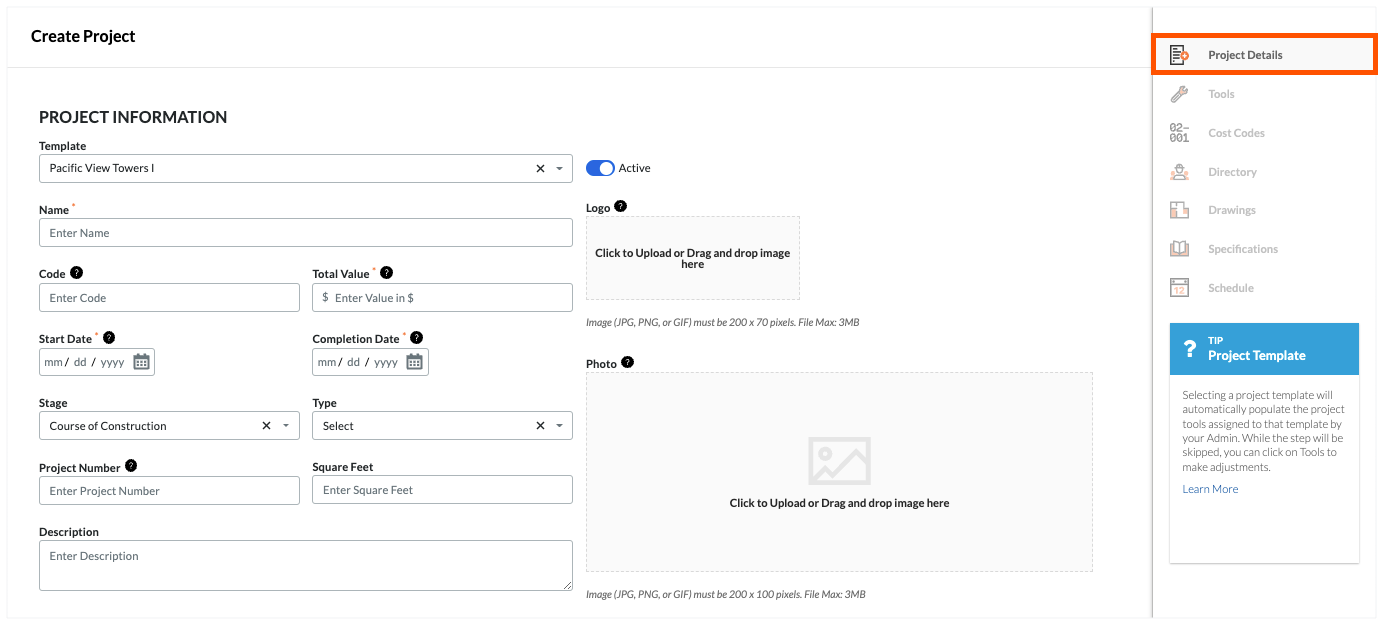
- Under Project Information, complete the following information as necessary:
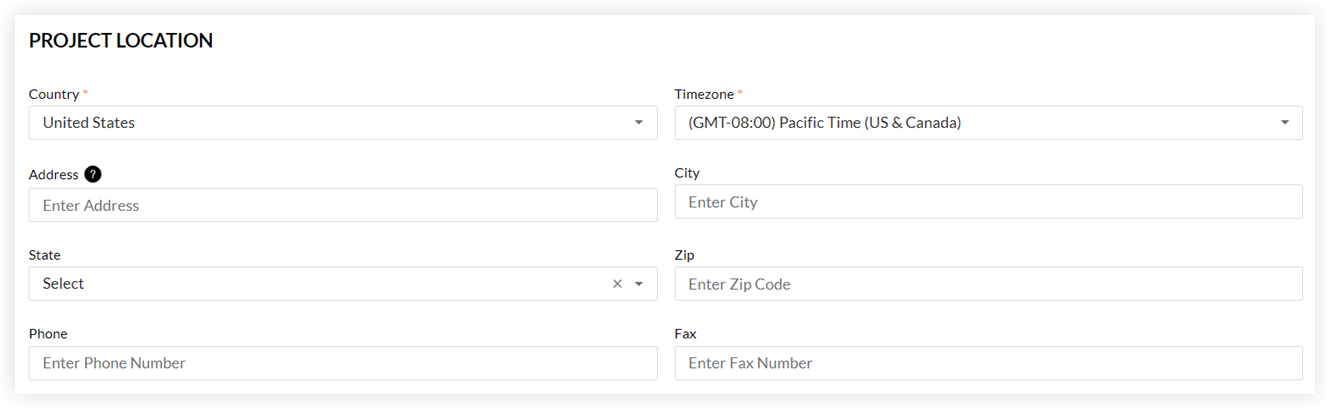
Note: An asterisk (*) below indicates a required field. - Under Project Location, complete the following information as necessary:
Note: An asterisk (*) below indicates a required field.
- Under Advanced, complete the following information as necessary:
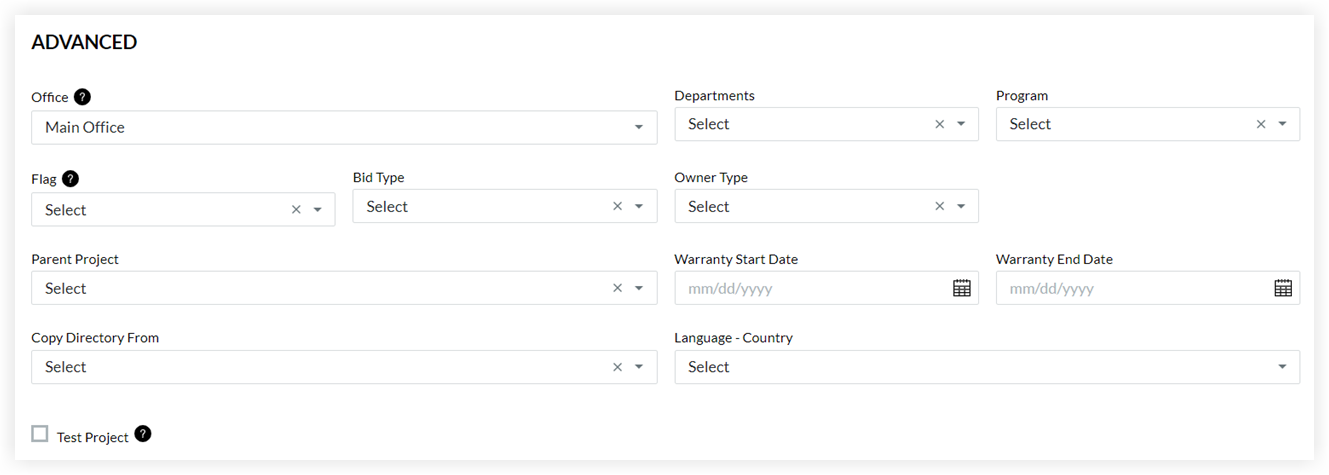
-
Under ERP Integration, do the following (Note: this step is only relevant to companies that are integrated with certain ERP systems):

- Allow project to be synced with ERP. Leave this checkbox marked if you plan to sync any part of the project's financials with your ERP software. This will ensure that the ERP Standard cost code list will be available to select from when configuring your Project Level cost codes.
Important
- This checkbox will be marked by default if your company has an available set of ERP cost codes, unless the template the project is created from does not have this box marked.
- If you plan to sync your new Procore project with your ERP software you MUST leave this checkbox marked. If you un-mark this box, you will not be able to re-mark it later if cost codes from a different Company Level list have been copied to the Project Level list in the Project Admin tool.
- Click Create Project.
Add and Remove Tools in the Project Toolbox
Tools selected on this page will appear in the project's tools menu, while tools that are not selected will not appear in the tools menu, and cannot be used.
Note: If you want to change which tools are available later, you can do so by navigating to the project's Admin tool. See Add and Remove Project Tools.
- Make sure Tools is highlighted.
Important! If the Tools link does NOT appear in the Project Creation Assistant, it is because the project template that you applied to your new project already determined the project's tools. - Add and remove tools for the project as follows:
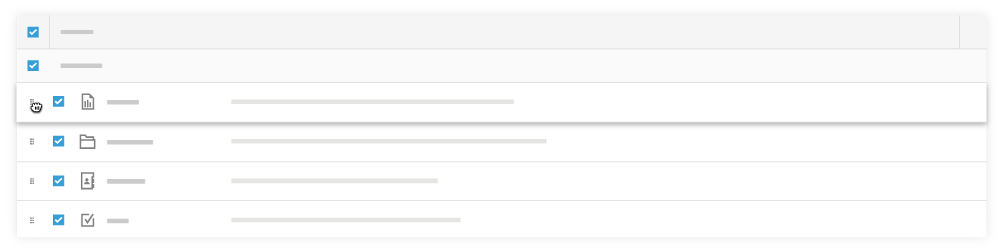
- To add a tool individually: Mark the checkbox next to box that corresponds to desired tool.
- To add all available tools within a category: Mark the checkbox next to the category name.
OR
To add all available tools from all categories: Mark the checkbox next to Select All.
Note: Clicking the checkbox again will deselect all tools. - To remove a tool: Clear the checkbox for that tool.
- If you want to rearrange the order of tools on the project's toolbar for all users:
- Hover over the grip ⁞⁞ icon next to the tool you want to move.
- Use a drag-and-drop operation to move the tool to a new position in the product category.
- Click Select Tools.
Note: The system displays a GREEN banner to confirm your settings were saved.
Add Project Cost Codes
Notes
- This page is only available in the Project Creation Assistant if your Procore account has the ERP Integrations tool enabled.
- Cost codes are managed in Procore's Work Breakdown Structure as segment items in the 'Cost Code' segment. See What are segments and segment items?
- Make sure Cost Code is highlighted.
Notes:- For information about Procore's default cost codes, see What are Procore's default cost codes?
- If your company account has enabled the Company level ERP Integrations tool, you will have the option to select the cost code list for your integrated ERP system from a Source drop-down list.
- To learn about cost codes for your specific integrated ERP system, see Configure Cost Code Preferences for ERP Integrations.
- If your company account has enabled the Procore + Viewpoint® Spectrum®, you must use the Standard Cost Code List. See Update Project Cost Codes for Export to Viewpoint Vista
- Choose from these options (A) or (B):
- If your Procore company account is NOT configured to work with an integrated ERP system, you will see the Standard Cost Code List page (pictured above). Choose from these options:
- To copy only selected codes from Procore's standard cost code list:
- Expand the desired division folder(s).
- Highlight the desired cost codes.
- Click Copy Selected Codes.
- To copy all of the codes from Procore's standard cost code list:
- Click Copy All Codes.
The system reveals the following confirmation message: "Once you add this cost code, the source list cannot be changed." - Click OK to acknowledge the confirmation message.
This moves all the codes in the Standard Cost Code List to the Project Cost Codes list.
- Click Copy All Codes.
- To copy only selected codes from Procore's standard cost code list:
- If your Procore account is configured to work with an integrated ERP system, you will see the Source drop-down list. Complete the following:
- Select Sage 300 CRE® Standard Cost Code List.
Note: You will only have the ability to select this option if your company has enabled the Procore + Sage 300 CRE® integration. This is a required setting for the Procore + Sage 300 CRE® integration.
- Select Sage 300 CRE® Standard Cost Code List.
- If your Procore company account is NOT configured to work with an integrated ERP system, you will see the Standard Cost Code List page (pictured above). Choose from these options:
- Click Next.
If your company has enabled the Procore + Sage 300 CRE® integration, the system reveals the Cost Codes & Cost Types page.
Assign Default Cost Types to Cost Codes
Note: This page is only available in this module if your Procore account has ERP integrations enabled.
- Make sure Cost Code is highlighted.
- For each cost code listed, mark one (1) or more checkboxes to assign each code to one (1) or more cost type.
Important!- Projects using Integration by Ryvit Cost Codes will use the Integration by Ryvit Standard Cost Types. Modifications to this cost type list must be done in Integration by Ryvit.
- Projects using Integration by Ryvit Cost Codes will use the Integration by Ryvit Standard Cost Types. Modifications to this cost type list must be done in Integration by Ryvit.
- Click Continue.
Your cost type assignments are automatically saved and Procore confirms that it has created your new project.
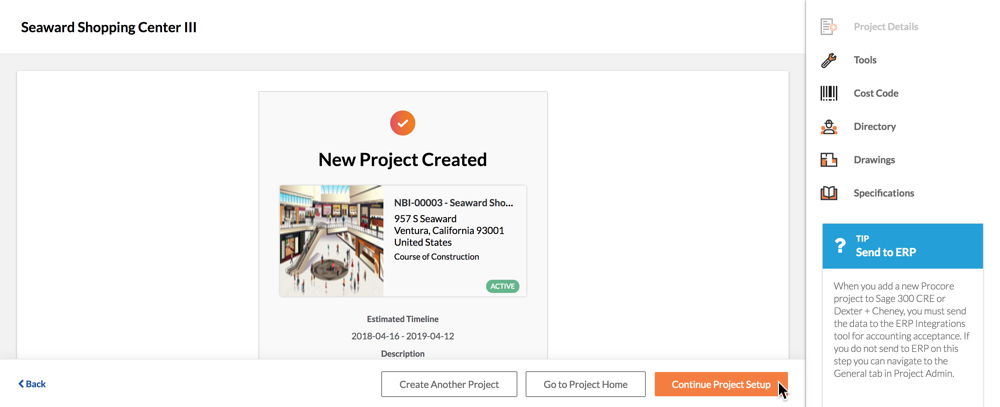
- Click Continue Project Setup.
Update Directory
- Make sure Directory is highlighted.
- Add contacts and companies from the Company Directory to your Project Directory as follows:
- If your project is based on an existing project template, you can add all of the companies and employees for those companies by clicking Select All in the drop-down menu.
- To add a company from Procore's Company Directory and all of that company's employees, begin typing the company name. When the system finds the appropriate match, select the company from the list. This adds both the company and people to the Project Directory.
- To add a person, begin typing the person's name. When the system finds the appropriate match, select that person from the list:
Notes:- If you want to remove a company or a person, click the delete
 icon across from the company or person.
 - If you want to remove all companies or people, click Clear All in the drop-down menu.
- If you want to remove a company or a person, click the delete
- For each person that you have selected to add, complete the following:
- Permission Template. Select the desired permission template from the list or choose 'Apply a Template Later.'
Important! This is a required setting for all of the users that you intend to add. To learn how the selections in this list are created, see Manage Project Permissions Templates. - Project Role. Select the project role for the user. The selection you make here will list the person for each selected role on the project's Home page. To learn how the selections in this list are created, see Add a Custom Project Role.
- Permission Template. Select the desired permission template from the list or choose 'Apply a Template Later.'
- Click Next.
A GREEN banner appears at the top of the page to confirm the number of companies and people added.
Upload Drawings
- Make sure Drawings is highlighted.
- Complete the following:
- To learn how to format drawings before uploading them to a project, see How can I improve the accuracy of OCR on my drawings?
- To skip this step and upload your project's drawing(s) at a later time, click Skip. When you are ready to upload your drawings, see Upload Drawings.
- Attach File(s). Click this button to choose from these options: Upload a file from your computer, Select a file from Procore, or if you have enabled the Box integration, Select a file from Box.
OR
Drag and Drop File(s). Use a drag-and-drop operation to move files from your computer or network to this area on the page. - Set Name. Enter a name for the drawing set.
- Set Date. Select a date for the drawing set using the calendar control.
- Default Drawing Date. Select a date for the drawing(s) using the calendar control.
- Default Received Date. Select the received date for the drawing(s) using the calendar control.
- Attach File(s). Click this button to choose from these options: Upload a file from your computer, Select a file from Procore, or if you have enabled the Box integration, Select a file from Box.
- Click Next.
The system processes the drawings in the background.
Note: You do NOT need to wait for the upload to complete. When finished, the system sends you an automated email notification with the subject line, "Drawing Upload Complete." To learn how to review and publish your drawings, see Review and Confirm Drawings and then Publish Drawings.
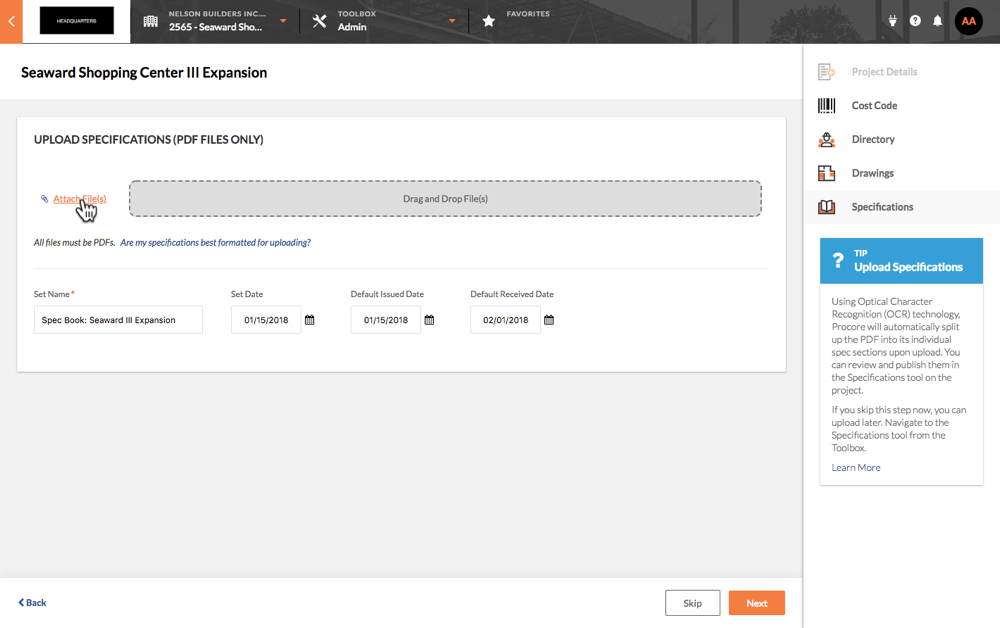
Upload Specifications
- Make sure Specifications is highlighted.
Notes:- If you want to skip this step and upload a specification later, click Skip. This closes the Project Creation Assistant.
- When you are ready to upload your specifications at a later time, see Upload Specifications.
- Complete the following:
Notes:- To learn how to format specifications before uploading them to a project, see How can I improve the accuracy of Specification Section Identification?
- Attach File(s). Click this button to choose from these options: Upload a file from your computer, Select a file from Procore, or if you have enabled the Box integration, Select a file from Box.
OR - Drag and Drop File(s). Use a drag-and-drop operation to move files from your computer or network to this area on the page.
- Set Name. Enter a name for the set.
- Set Date. Select a date for the set using the calendar control.
- Default Issued Date. Select a date for the file(s) using the calendar control.
- Default Received Date. Select the received date for the file(s) using the calendar control.
- Attach File(s). Click this button to choose from these options: Upload a file from your computer, Select a file from Procore, or if you have enabled the Box integration, Select a file from Box.
- To learn how to format specifications before uploading them to a project, see How can I improve the accuracy of Specification Section Identification?
- Click Next.
The system processes the specification upload.
Note: You do NOT need to wait for the upload to complete. When finished, the system sends you an automated email notification with the subject line, "Specification Upload Complete." To learn how to review and publish your specifications, see Review and Publish Specifications.
Upload Schedule
- Make sure Schedule highlighted.
Notes:- If you want to skip this step and upload a schedule later, click Skip. This closes the Project Creation Assistant.
- When you are ready to upload your schedule at a later time, see Upload a Project Schedule File to Procore's Web Application.
- Complete the following:
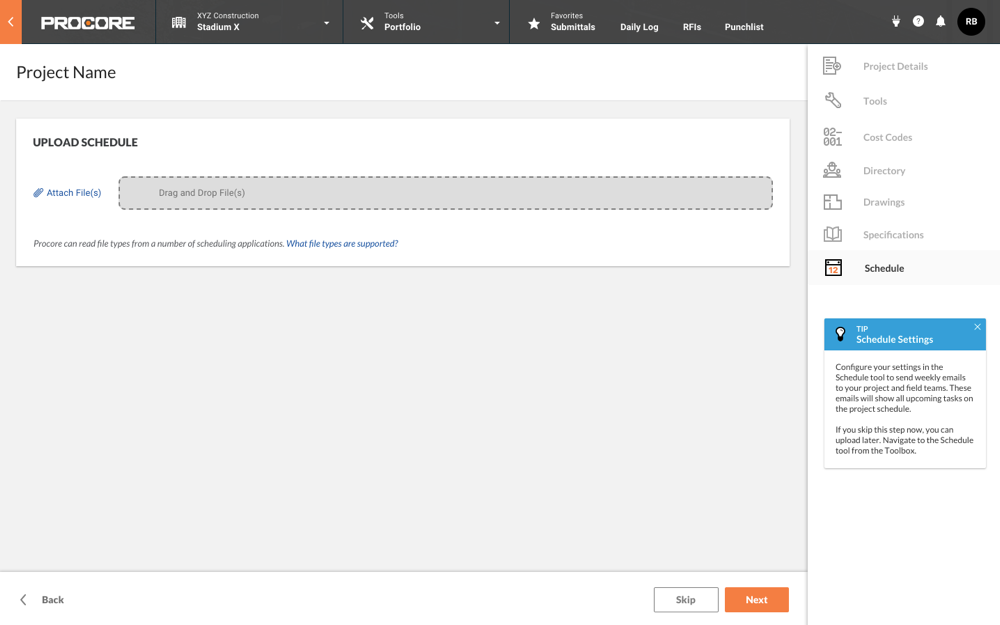
- Click Attach File(s). Then navigate to the schedule file on your computer or network. Then click Open.
Notes:- The Project Creation Assistant only supports file upload via your web browser. It does not currently support file uploads stored in the Project level Documents tool.
- If you want to store a schedule file in the Documents tool and then upload it, see "File Upload Via Procore Documents" in the Upload a Project Schedule File to Procore's Web Application.
- You can also upload a schedule file using Procore Drive. For details, see Schedule in the Procore Drive User Guide.
- Click Next.