Sage 100 Contractor® Workflows
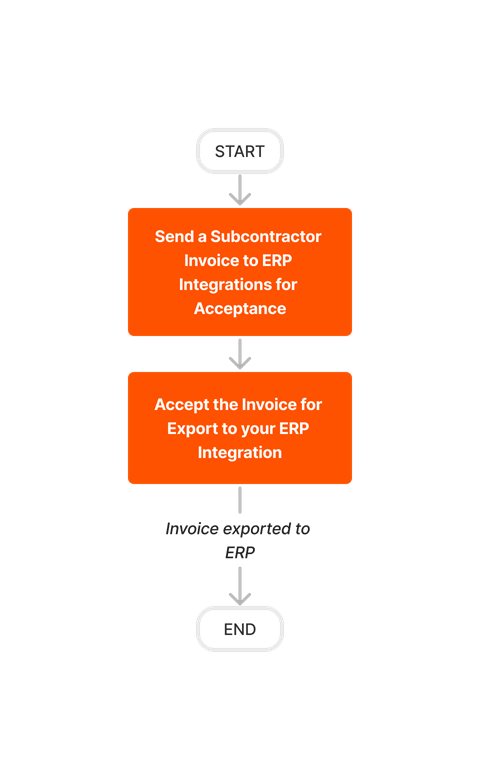
The following workflow diagrams explain the order of operations when creating certain types of items in a Procore project, when your company's Procore account has been integrated with Sage 100 Contractor®.
The following workflow diagrams explain the order of operations when creating certain types of items in a Procore project, when your company's Procore account has been integrated with Sage 100 Contractor®.
If you are setting up a new job/project for Procore + Sage 100 Contractor®, use the workflow below as a guideline.
Important! When setting up a new job/project in Procore, you must always add the job/project in one system and then add it to the other. You cannot create a job in both systems and then sync them at a later time.


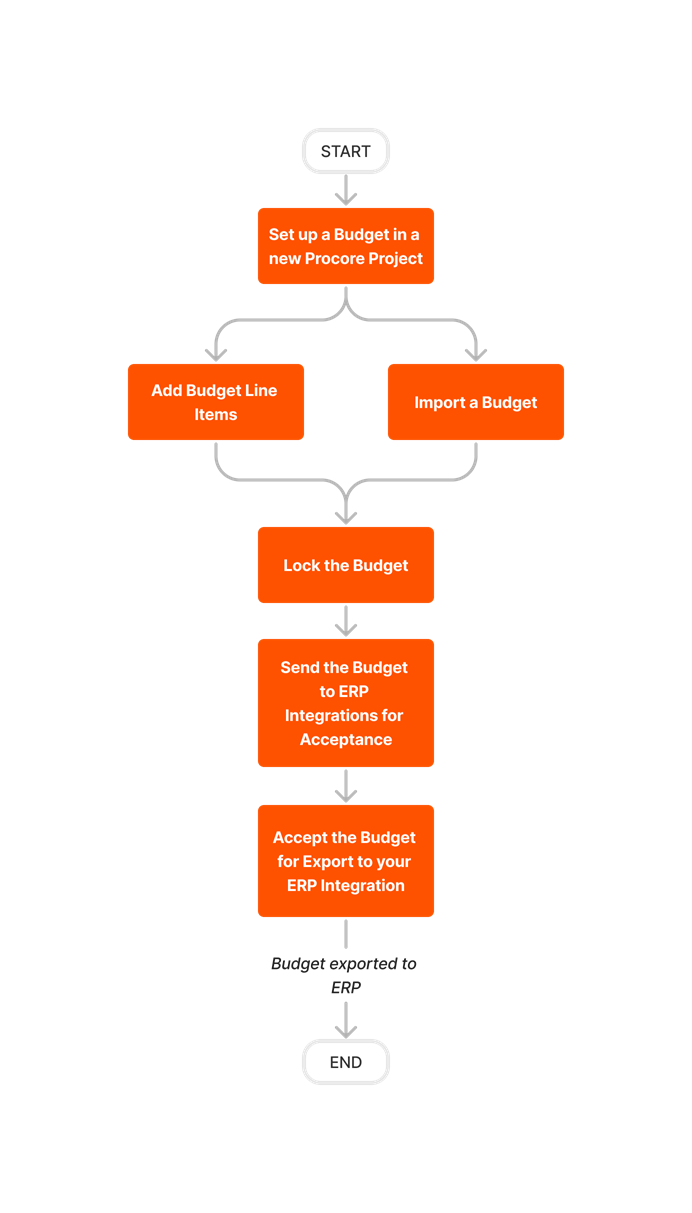
If you are setting up the budget on a Procore + Sage 100 Contractor® project for the first time, use the workflow below as a guideline.
Important! When setting up a new project in Procore, you must always set up the budget in one system and then import or export it to the other. You cannot create a budget in both systems and then sync the budgets a later time. Once it is set up as desired, updates to the budget must be managed in the system in which it was created.


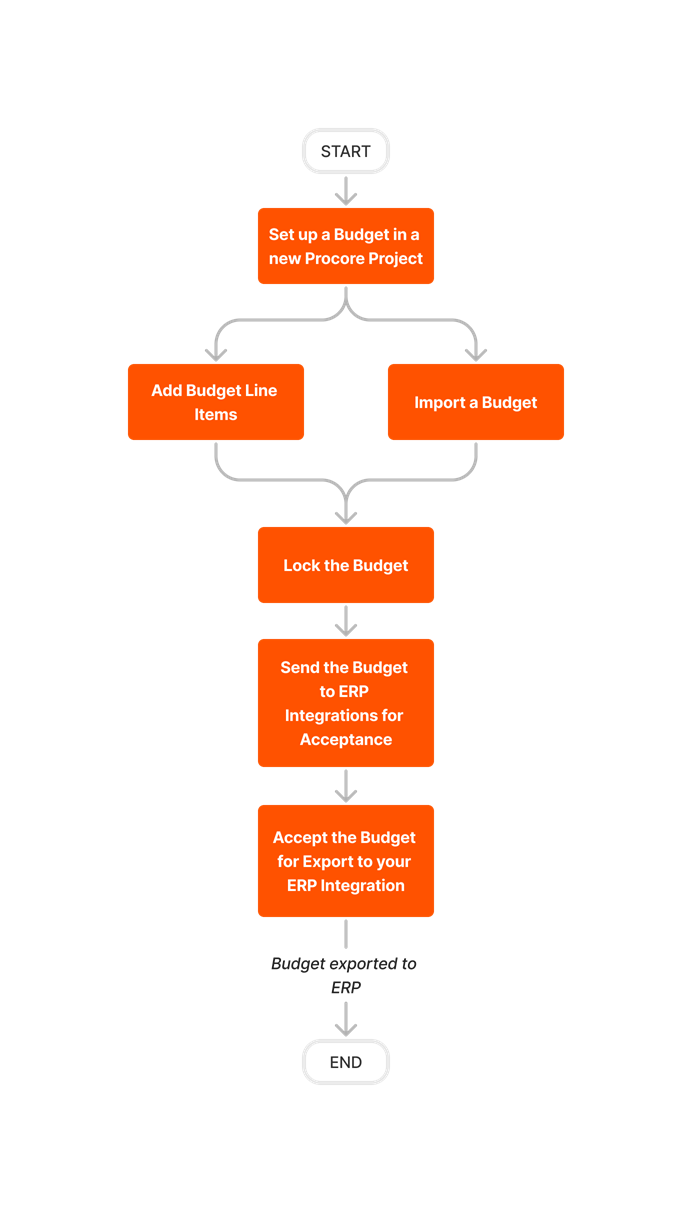


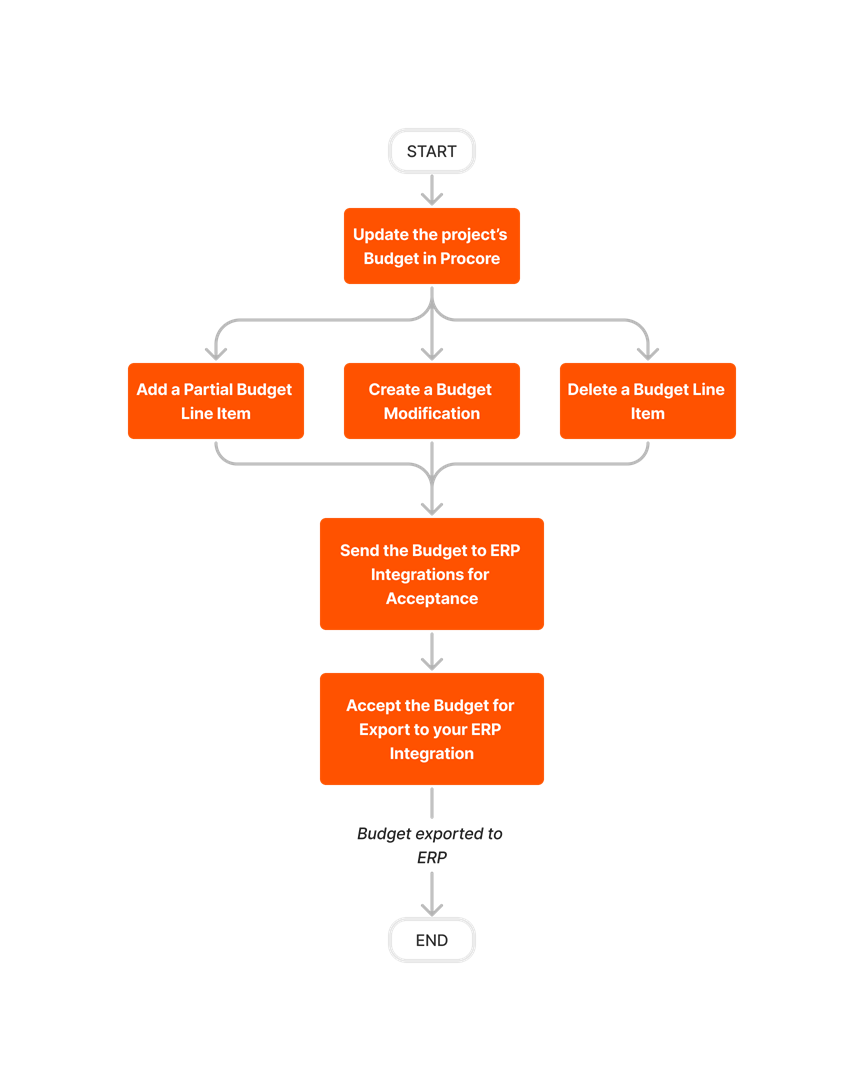
If you need to update a budget in Procore after exporting it to Sage 100 Contractor®, use the workflow below as a guideline.


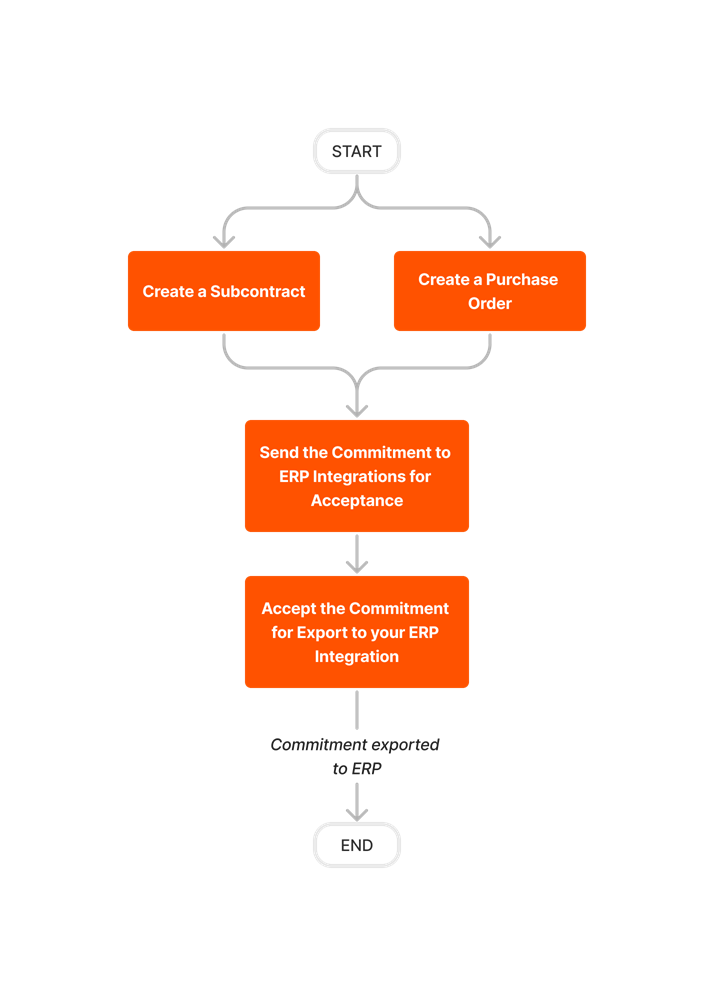
Follow the steps below to create commitments in Procore and then export them to Sage 100 Contractor®.
Important! After a Procore project is synced with a Sage 100 Contractor® job, commitments must always be created in Procore using the steps below. Do NOT create commitments directly in Sage 100 Contractor®.
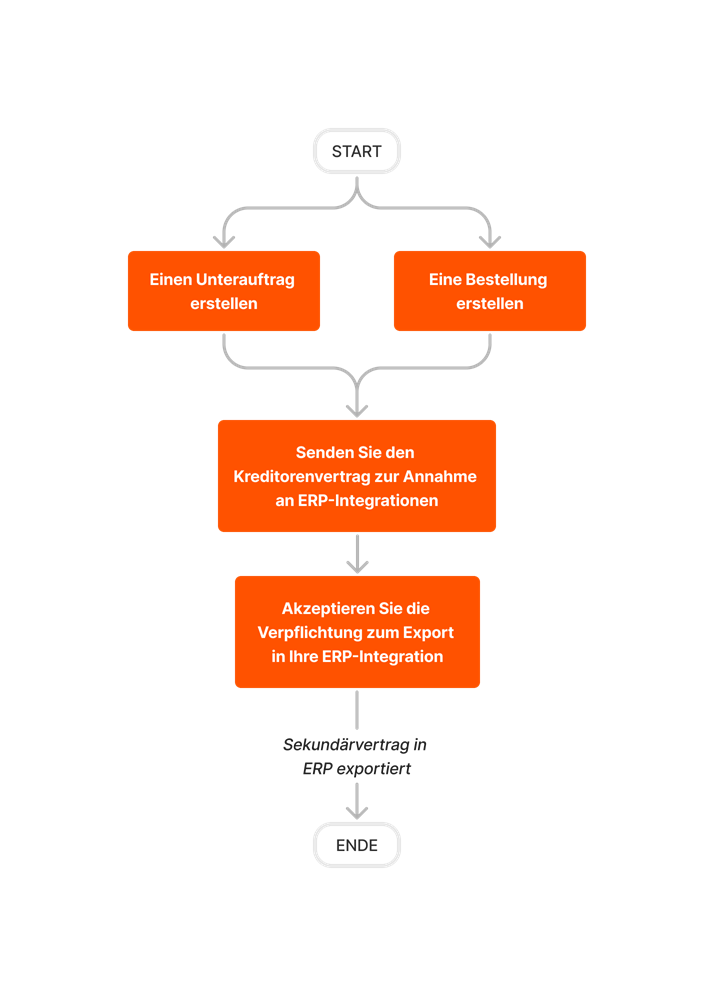


Follow the steps outlined below to create Commitment Change Orders (CCOs) in Procore and then export them to Sage 100 Contractor®.
Important! Change orders can only be created from synced commitments.


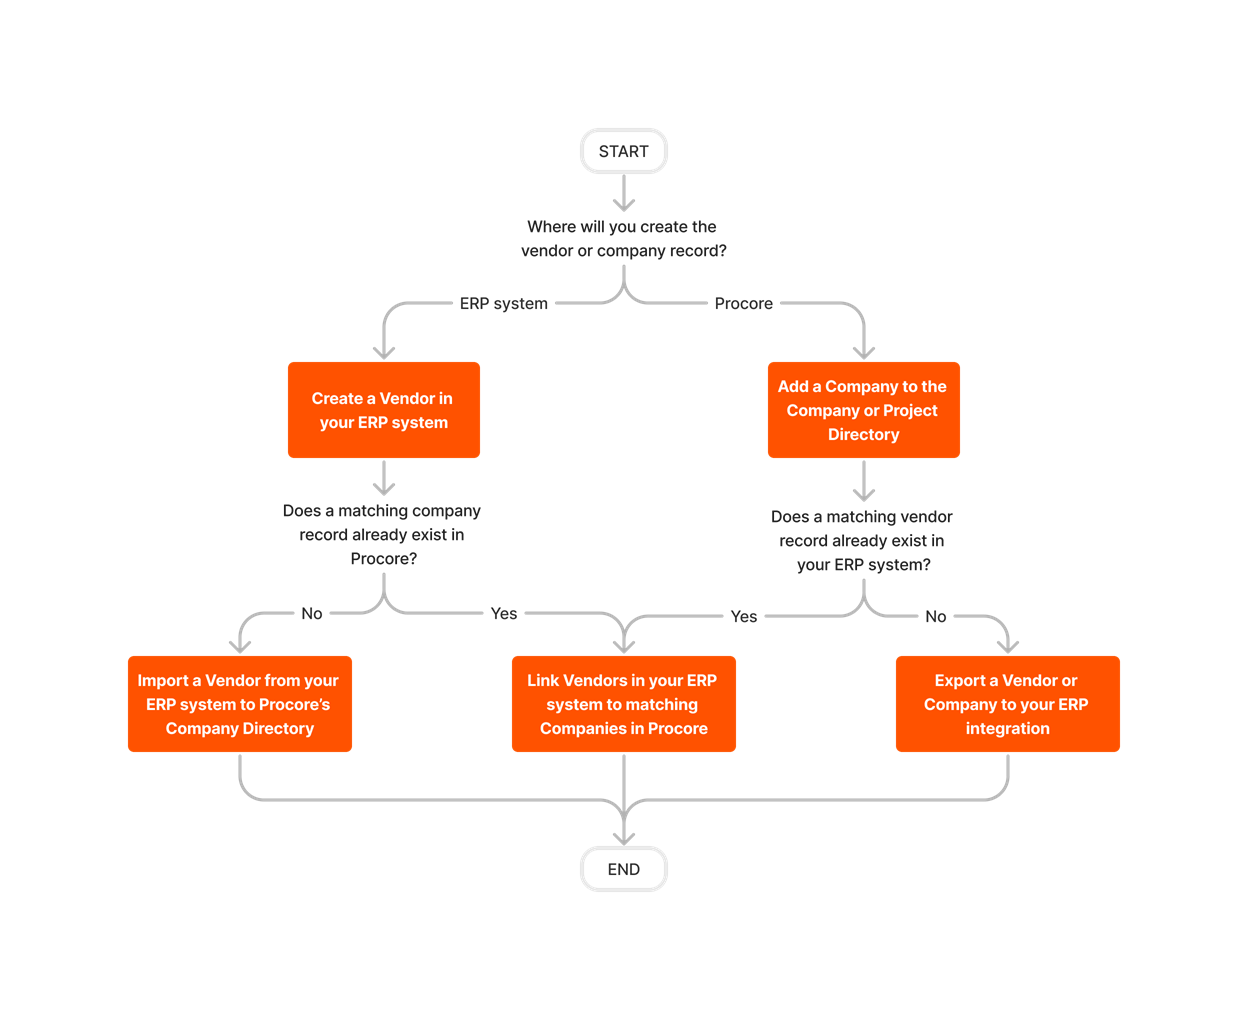
There are two different ways to sync vendor data between Procore and Sage 100 Contractor®.
Important! Vendors can be created in either Procore or Sage 100 Contractor®.
