Tutorials
Introduction
The procedures outlined in the following sections assume you are using the cloud-based Office 365® (Outlook.com) product. The steps may differ if you are using the on-premise version of Microsoft® Exchange and the desktop version of Outlook. Refer to Office documentation for admins and IT professionals on the Microsoft website for exhaustive information on configuring and managing Microsoft Office products. Also, visit the Procore Learning Portal for a guided course on installing and using the Procore for Outlook integration.
Contents
- Setting Up Procore for Outlook
- Activating the Add-in in Outlook
- Choosing a Procore Company and Project
- Saving an Outlook Email to the Procore Emails Tool
- Saving Outlook Email File Attachments to the Procore Documents Tool
- Working with Quick Create
- My Open Items
Setting Up Procore for Outlook
Use the following steps to set up Procore for Outlook and deploy it to your organization. You must have administrative access to your Microsoft Office 365 organization in order to complete the installation and setup steps.
Note
This procedure assumes you are using the cloud-based Office 365 (Outlook.com) product. The steps may differ if you are using the on-premise version of Microsoft Exchange and the desktop version of Outlook. More information can be found in this Microsoft support article.- Open your browser and go to the Microsoft AppSource.
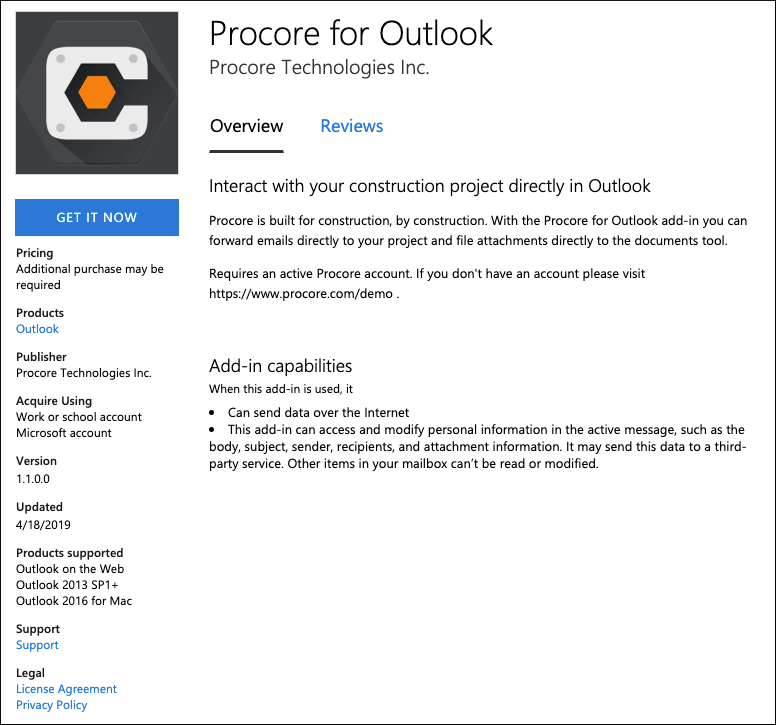
- Click Get it Now. You are prompted to sign-in to the Microsoft AppSource,

- Click Sign in. Agree to the terms of use and privacy policy and click Continue.

- Begin the deployment process by clicking Next.
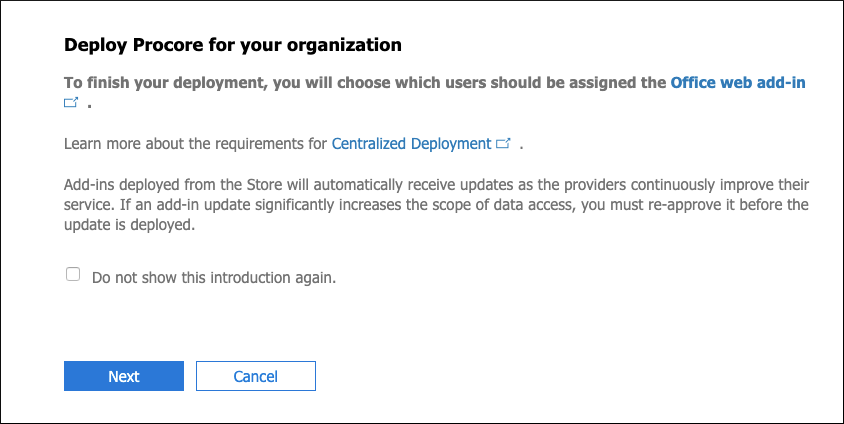
- Specify who will have access to the add-in - everyone, specific users/groups, or just you - then click Deploy Now.

- Once the add-in deploys successfully, click Next.

- Complete this stage of the deployment by clicking Close.

Activating the Add-in in Outlook
Once Procore for Outlook has been successfully deployed to your organization by your site administrator, you can begin using the add-in within Outlook. Use the following steps to activate the add-in in Outlook.
- Log in to Outlook and go to your 'Inbox'.
- Select an existing email.
- In the 'ribbon' of the message open More actions... and choose Procore for Outlook. (Note: You must have the Outlook 'Reading Pane' option selected in order for the Procore for Outlook button to be enabled and available.)

- On the 'Welcome' panel, click Sign In.
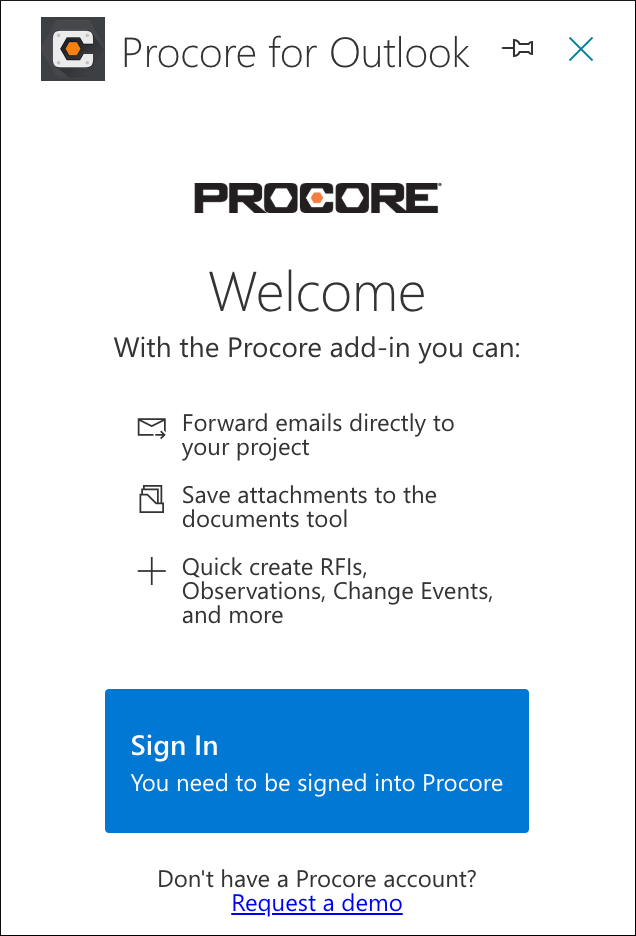
- On the Procore login screen, enter your Procore credentials and click Log In. You are now able to utilize all the features of Procore for Outlook including forwarding emails from Outlook to Procore, uploading attachments to the Documents, quick-creating RFIs, Observations, Change Events, and Tasks as described in the following sections.
Choosing a Procore Company and Project
After you sign in to Procore for Outlook you need to select which Procore Company and Project you want to work in. With an existing email message selected, complete the following steps to set your Company and Project.
- In the Select a Company panel, make your choice from the list of available Companies.
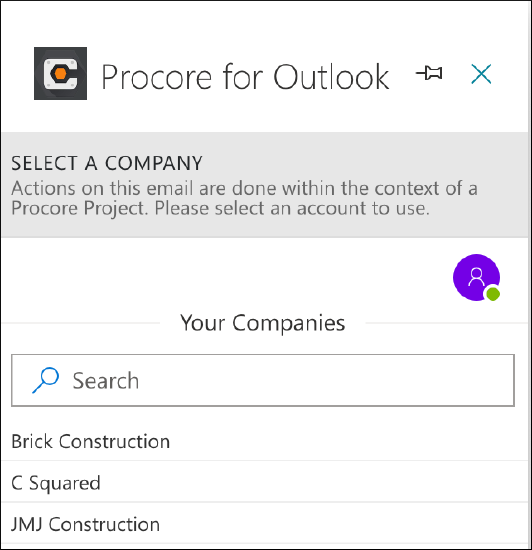
- In the Select a Project panel, choose the Project you want to work with.

Saving an Outlook Email to the Procore Emails Tool
Use the following steps to save an Outlook email message to the Procore Emails tool.
- Log in to Outlook and go to your 'Inbox' (or other folder with existing messages).
- Select an existing email.
- In the 'ribbon' of the message open More actions... and choose Procore for Outlook. (Note: You must have the Outlook 'Reading Pane' option selected in order for the Procore for Outlook button to be enabled and available.)

- In the 'Procore for Outlook' panel, click Save to Emails Tool.

- Confirm your action by clicking Save to Procore.
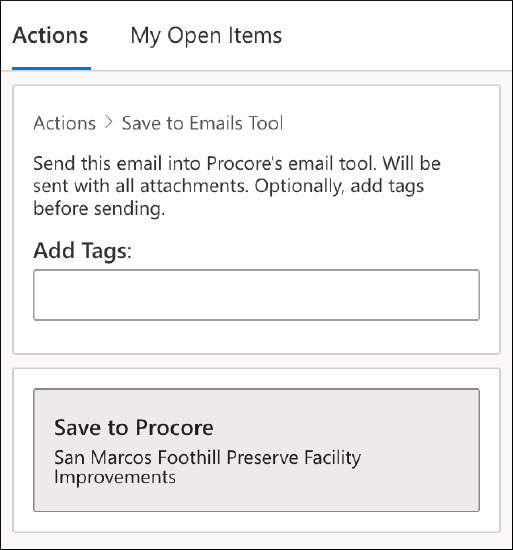
Optionally, you can add one or more tags to the email. Any existing email attachments are also saved to Procore.
- If successful, you will see the following message indicating that your email has been saved to Procore.

Saving Outlook Email File Attachments to the Procore Documents Tool
Use the following steps to save email file attachments to the Procore Documents tool.
- Log in to Outlook and go to your 'Inbox' (or other folder with existing messages).
- Select an existing email that includes at least one file attachment.
- In the 'ribbon' of the message open More actions... and choose Procore for Outlook. (Note: You must have the Outlook 'Reading Pane' option selected in order for the Procore for Outlook button to be enabled and available.)

- In the 'Procore for Outlook' panel, click Save to Documents Tool.

- Enter the filename(s) you want to use for the attachment(s) (or use the default), choose the Documents folder(s) you want to save the attachment(s) in (or create new ones) and click Save to Procore. Attachments are saved to the folder you have specified.

Working with Quick Create
You can use the Quick Create functions to quickly upload information to Procore.
Photos
Complete the following steps to upload attached image files from an Outlook email directly to the Procore Photos tool.
- Log in to Outlook and go to your 'Inbox' (or other folder with existing messages).
- Select an existing email that includes at least one image file attachment.
- In the 'ribbon' of the message open More actions... and choose Procore for Outlook. (Note: You must have the Outlook 'Reading Pane' option selected in order for the Procore for Outlook button to be enabled and available.)
- Click Photo.

- Select the Album you want to store the image in, enter or select an appropriate Trade, specify the image as Private if needed, and enter a filename under Attachments (or accept the default name).

- Click Save to Procore.
- If successful, you will see the following message indicating that your image file has been saved to Procore.

- Click View in Procore if you want to launch Procore and see the image in the Photos tool.
RFIs
Complete the following steps to create a draft RFI directly from Outlook.
- Log in to Outlook and go to your 'Inbox' (or other folder with existing messages).
- Select an existing email.
- In the 'ribbon' of the message open More actions... and choose Procore for Outlook. (Note: You must have the Outlook 'Reading Pane' option selected in order for the Procore for Outlook button to be enabled and available.)
- Click RFI.

- Enter a Subject and Question for the RFI, and specify Assignees, the RFI Manager, and Received From. Optionally select Attachments as needed, then click Create Draft RFI.

- If successful, you will see the following message indicating that your draft RFI has been saved to Procore.

- Click Continue editing in Procore if you want to launch Procore and work on the draft RFI in the RFI tool.
Correspondence
Complete the following steps to create a 'Draft' correspondence item directly from Outlook.
- Log in to Outlook and go to your 'Inbox' (or other folder with existing messages).
- Select an existing email to create the correspondence item from.
- In the 'ribbon' of the message open More actions... and choose Procore for Outlook.
Note: You must have the Outlook 'Reading Pane' option selected in order for the Procore for Outlook button to be enabled and available. - Click Correspondence.

- Add the following information as applicable:
- Correspondence Type: Select a correspondence type. See Create a New Correspondence Type.
- Title: The subject line from the email is automatically entered as the item's Title, but you can enter a different name for the correspondence item.
- Description: Enter a description for the correspondence item.
- Assignees: Enter one or more users to be designated as assignees for the correspondence item.
- Distribution Members: Enter one or more users to be included in the distribution list for the correspondence item.
- Private: Mark this checkbox to make the correspondence item 'Private'. 'Private' correspondence items are only visible to their creator, the user listed in Received From, the users listed in Assignees, the users listed in Distribution, and users with company or project level 'Admin' permissions.
Note
- Users who belong to the same companies as the users listed on the item can also view 'Private' items if they have the 'View Private Items Accessible to Users within Same Company' granular permission enabled on their permissions template for the item's correspondence type.
- You can see who has the permissions to view a 'Private' correspondence item on the 'Permissions' tab when viewing the correspondence item in Procore.
- Attachments: Any attachments included in the email are automatically included as the correspondence item's attachments. You can remove any irrelevant attachments, but you cannot add new attachments when creating the item.

- Click Create Draft Correspondence.
The "Draft Correspondence Created" banner displays.

- Optional: Click Continue editing in Procore if you want to navigate to Procore to continue making changes to the correspondence item in the Procore web application.
Tasks
Complete the following steps to create a new Task directly from Outlook.
- Log in to Outlook and go to your 'Inbox' (or other folder with existing messages).
- Select an existing email.
- In the 'ribbon' of the message open More actions... and choose Procore for Outlook. (Note: You must have the Outlook 'Reading Pane' option selected in order for the Procore for Outlook button to be enabled and available.)
- Click Task.

- Enter a Title and Description for the Task, and specify Status, Category, and Due Date. Optionally select Attachments as needed, then click Create Task Item.

- If successful, you will see the following message indicating that your Task has been saved to Procore.

- Click Continue editing in Procore if you want to launch Procore and work on the Task in the Tasks tool.
Change Events
Complete the following steps to create a new Change Event directly from Outlook.
- Log in to Outlook and go to your 'Inbox' (or other folder with existing messages).
- Select an existing email.
- In the 'ribbon' of the message open More actions... and choose Procore for Outlook. (Note: You must have the Outlook 'Reading Pane' option selected in order for the Procore for Outlook button to be enabled and available.)
- Click Change Event.

- Enter a Title and Description for the Change Event, and specify Status, Scope, and Type. Optionally select Attachments as needed, then click Create Change Event.

- If successful, you will see the following message indicating that your Change Event has been saved to Procore.

- Click Continue editing in Procore if you want to launch Procore and work on the Change Event in the Change Events tool.
Observations
Complete the following steps to create a new Observation directly from Outlook.
- Log in to Outlook and go to your 'Inbox' (or other folder with existing messages).
- Select an existing email.
- In the 'ribbon' of the message open More actions... and choose Procore for Outlook. (Note: You must have the Outlook 'Reading Pane' option selected in order for the Procore for Outlook button to be enabled and available.)
- Click Observation.

- Enter a Title, Type, and Description for the Observation, then specify Contributing Behavior and Contributing Condition. Optionally select Attachments as needed, then click Create Observation.

- If successful, you will see the following message indicating that your Observation has been saved to Procore.

- Click Continue editing in Procore if you want to launch Procore and work on the Observation in the Observations tool.
My Open Items
You can conveniently view and access your Procore Open Items from Outlook using the following steps.
- Log in to Outlook and go to your 'Inbox' (or other folder with existing messages).
- Select an existing email.
- In the 'ribbon' of the message open More actions... and choose Procore for Outlook. (Note: You must have the Outlook 'Reading Pane' option selected in order for the Procore for Outlook button to be enabled and available.)
- Click My Open items.

- Your currently open items are categorized by type. Click on the link to an item to view details.