Update Custom Procore Analytics Reports Using Legacy Custom Fields
Objective
To update a custom report to include Procore's legacy custom fields in Power BI Desktop.
Steps
- Open Power BI Desktop.
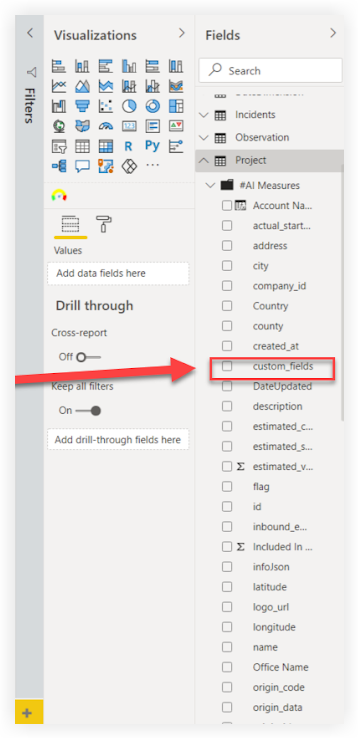
- Open a report that has been customized to use legacy custom fields from one of the following Procore fieldsets:
- Project
- Prime Contracts
- Purchase Orders
- Subcontracts
Note
The screenshots throughout this tutorial use Procore's 'Project' fieldset as an example.
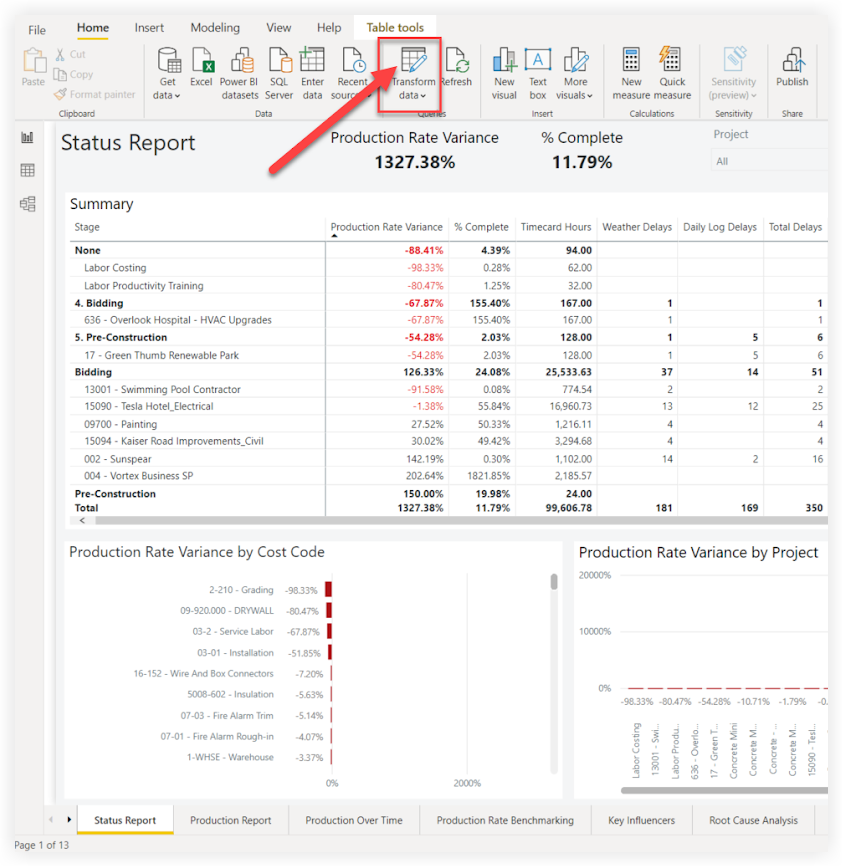
- Click Transform Data to open the Power Query Editor.
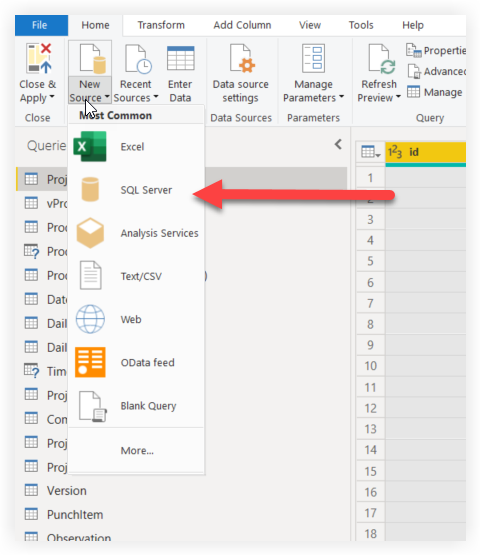
- Click New Source and select SQL Server from the drop-down menu.
- In the SQL Server database window:
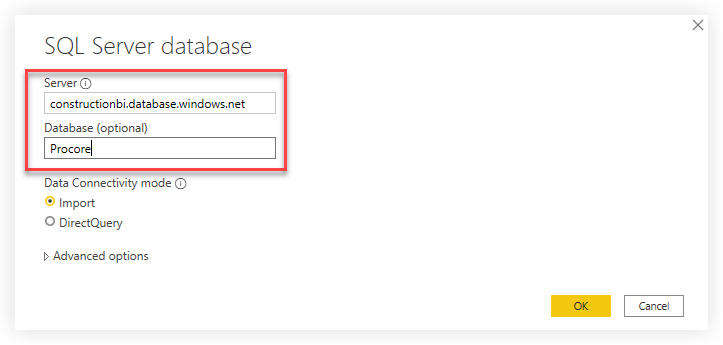
- Enter constructionbi.database.windows.net in the Server field.
- Enter Procore in the Database field.
- Click the Import button under the Data Connectivity mode options.
- Click OK.
- In the Navigator window:
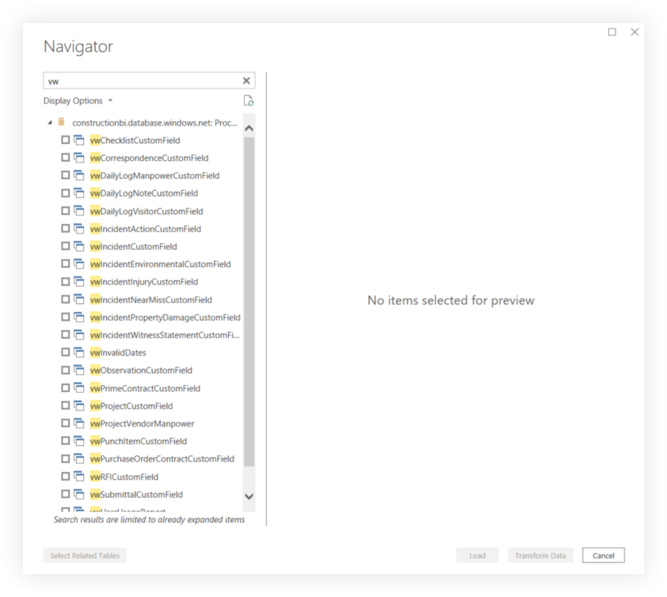
- Enter the SQL view name in the search bar to locate the custom field table.
Below are the SQL view names for the fieldsets applicable to this tutorial:- Project: vwProjectCustomField
- Prime Contracts: vwPrimeContractCustomField
- Purchase Orders: vwPurchaseOrderContractCustomField
- Subcontracts: vwWorkOrderContractCustomField
- Mark the checkbox next to the search result.
- Click OK.
- Enter the SQL view name in the search bar to locate the custom field table.
- Select the fieldset's ID column, the custom_field_key_label column, and the custom_field_value column.
Below are the column names for the fieldset identifiers applicable to this tutorial:- Project: ID
- Prime Contracts: PrimeContract_ID
- Purchase Orders: PurchaseOrderContract_ID
- Subcontracts: WorkOrderContract_ID
- To select all columns:
- Left click one column name.
- Hold the CTRL key and left click the other column names
- Right click on one of the three selected columns and select Remove Other Columns from the drop-down menu.

- Select the custom_field_key_label and custom_field_value columns.
To select the two columns:- Left click one column name.
- Hold the CTRL key and left click the other column name.
- Click the Transform tab.
- Click Pivot Column.
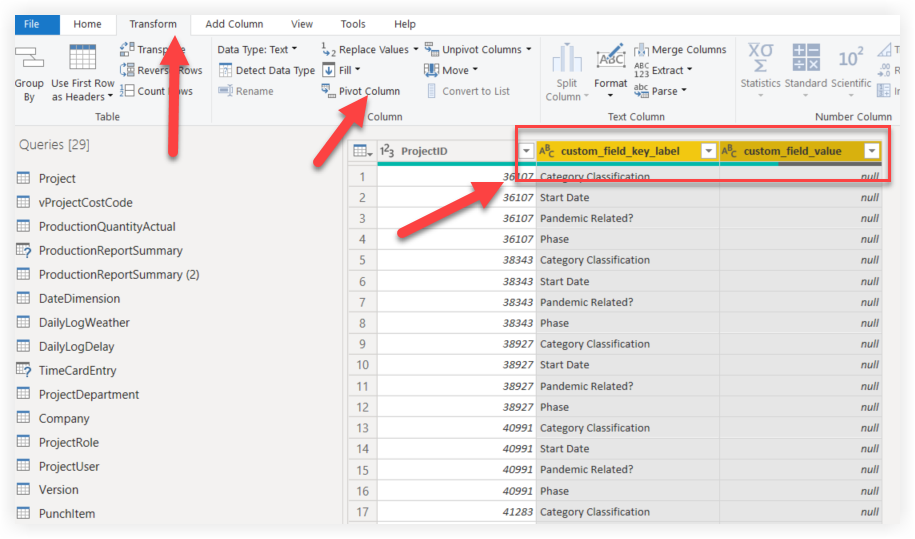
- In the Pivot Column window:
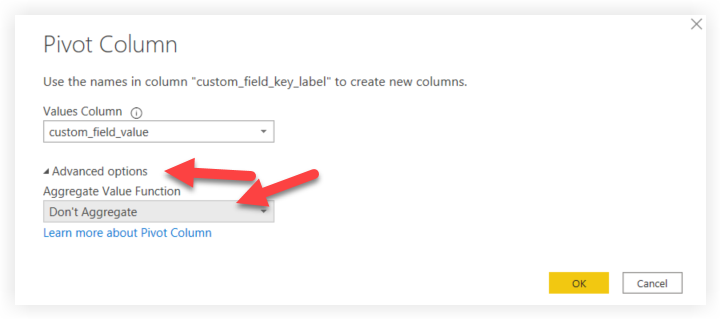
- Click Advanced options.
- Select Don't Aggregate from the Aggregate Value Function drop-down menu.
- Click OK.
- Click the Home tab.
- If the update was successful, you will see your company's custom fields as individual columns in the query corresponding to their fieldset.
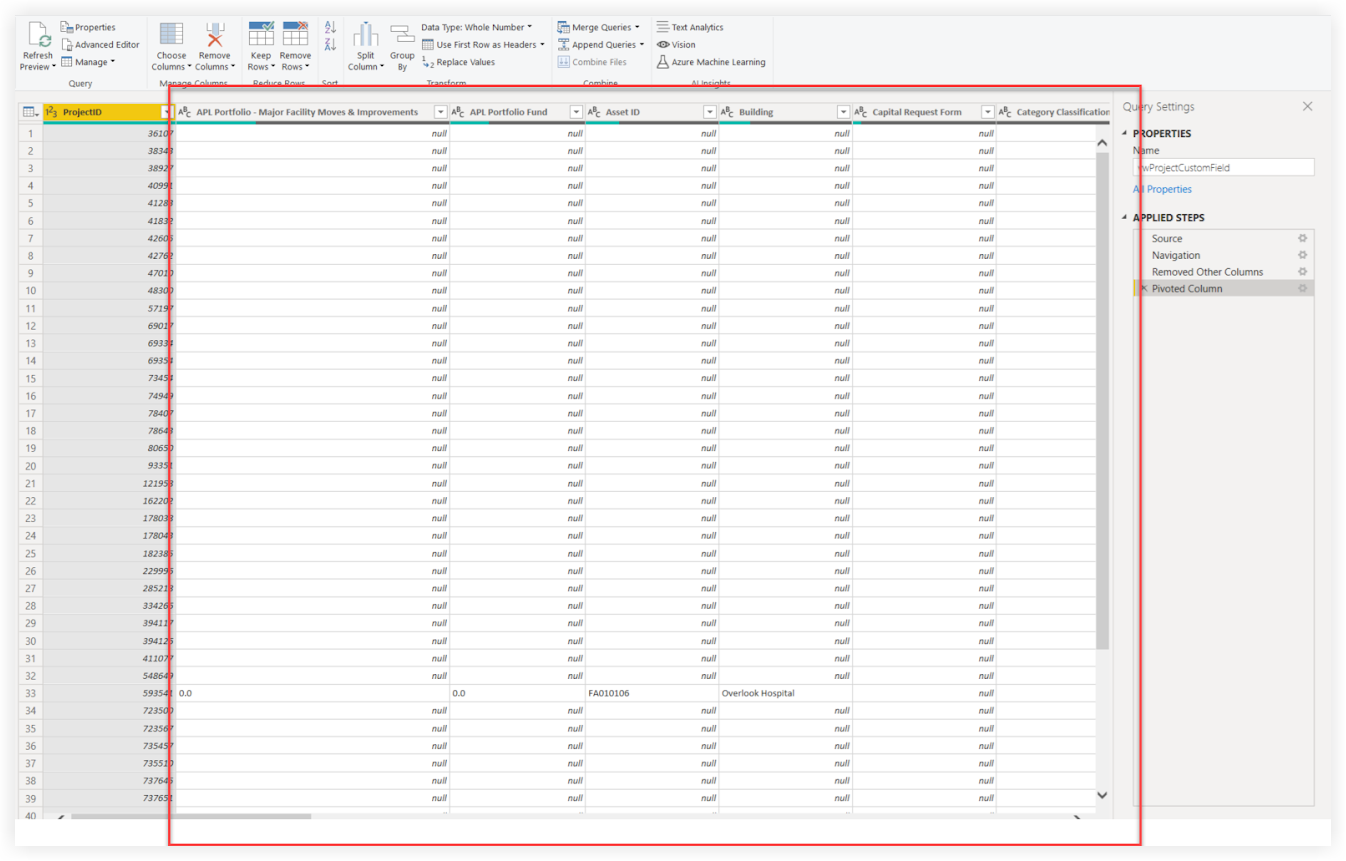
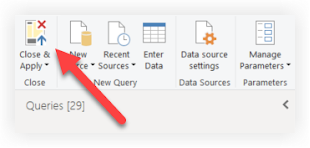
- Click Close & Apply.
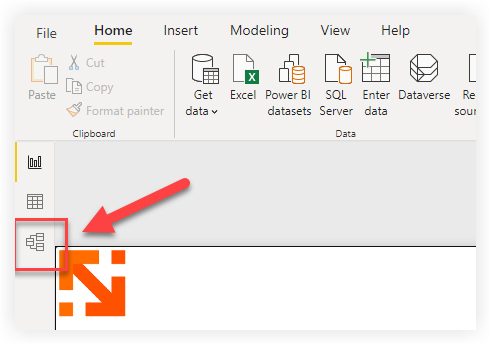
- On your report, click the Model view.
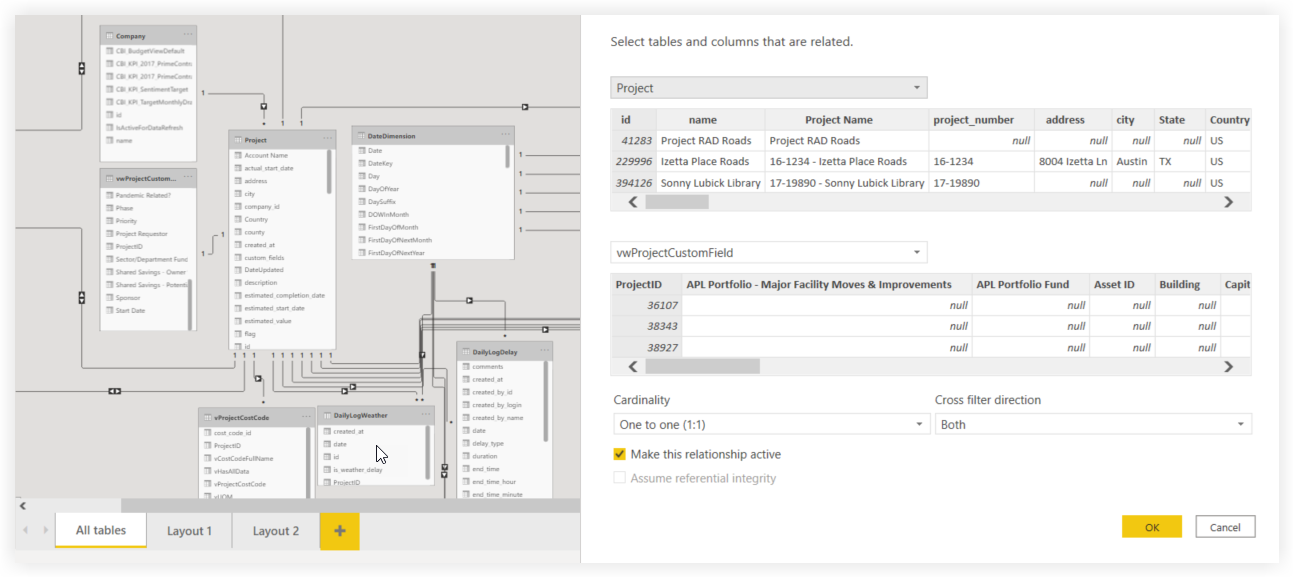
- Establish a relationship with the appropriate table and columns for the fieldset.
- Project: Connect Project.ID to vwProjectCustomField.ProjectID
- Prime Contracts: Connect PrimeContract.ID to vwPrimeContractCustomField.PrimeContract_ID
- Purchase Orders: Connect PurchaseOrderContract.ID to vwPurchaseOrderContractCustomField.PurchaseOrderContract_ID
- Subcontracts: Connect WorkOrderContract.ID to vwWorkOrderContractCustomField.WorkOrderContract_ID
- Reconfigure your report's visuals by sourcing the applicable custom field data from the new table you've created.
- Save and publish your report.