How do contract approvals work in Portfolio Financials?
Answer
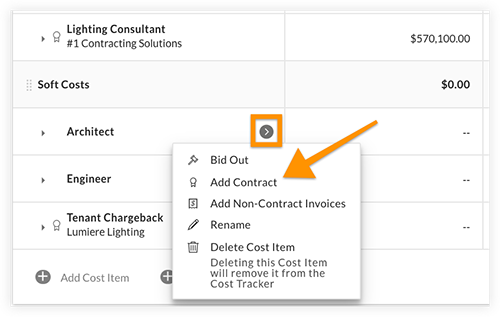
After you click Add Contract (shown below), you will be prompted to set up an approval package.
Video
Steps
Click a link to jump to a section of this article:
- Step 1: Begin Contract Setup
- Step 2: Set up the Contract Package
- Step 3: Review Approvers
- Step 4: Review and Send
Step 1: Begin Contract Setup
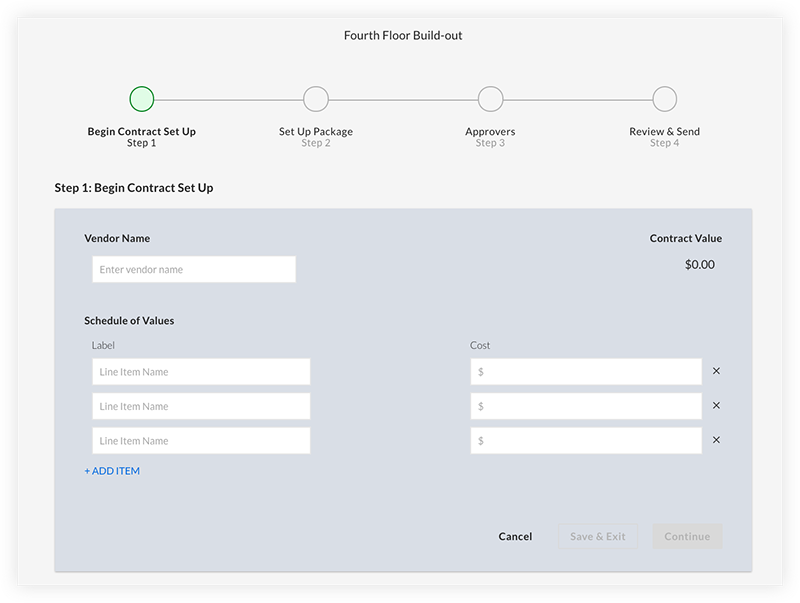
You will need to enter the vendor name and add the Schedule of Values.
Step 2: Set up the Contract Package
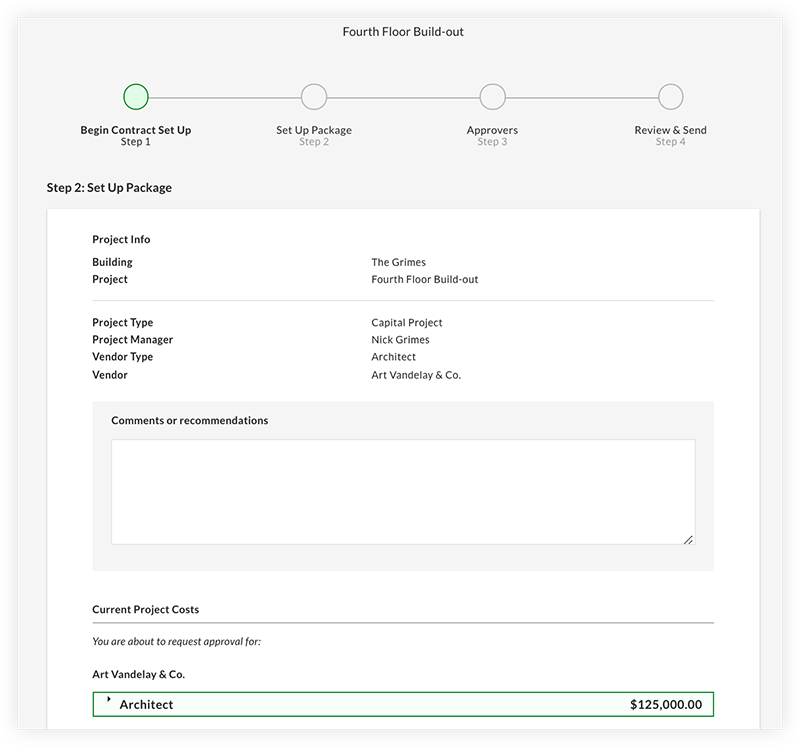
You can choose to add any comments or recommendations in the text box. You will also be able to review the contract proposal against other project costs, as well as attach any supporting files to the approval package.
Step 3: Review Approvers
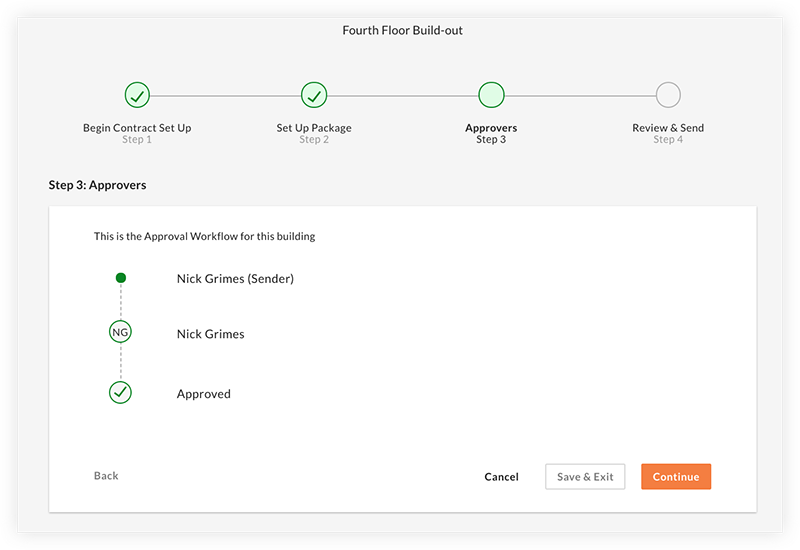
The next step is to review the approvers in the queue.
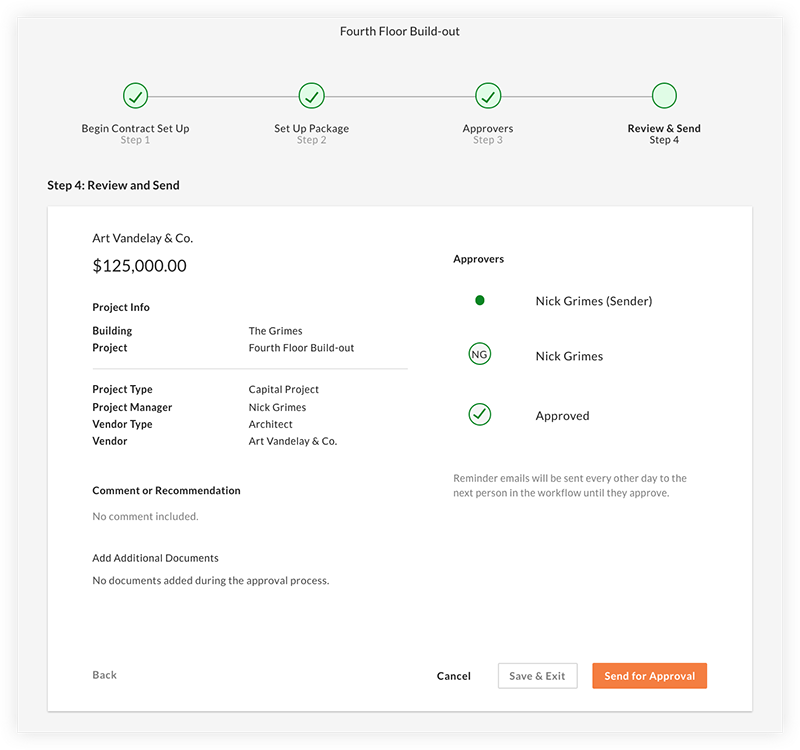
Step 4: Review and Send
At this point, you will review the approval package and initiate the process.
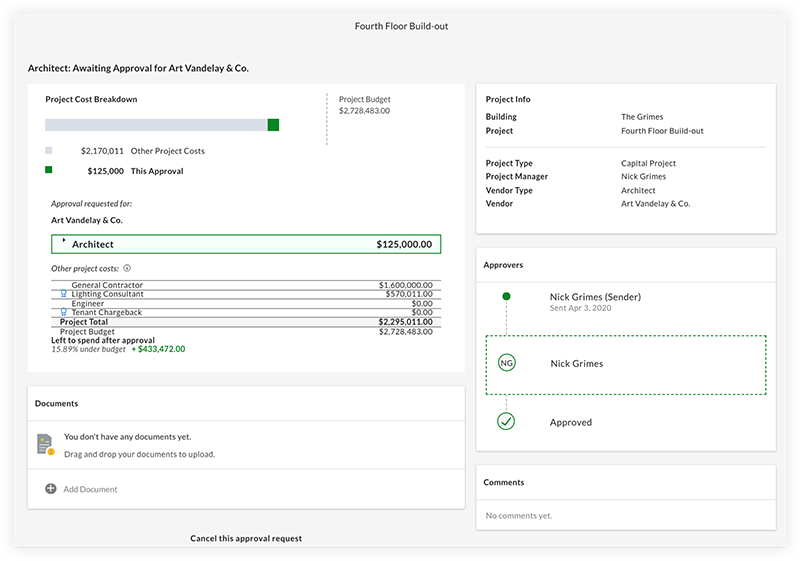
Note: While individual approvals are pending, the approval workflow sheet shows the following:
After all parties have approved, you will be notified to finalize the contract. You will finalize the contract by clicking Finalize Contract Settings. 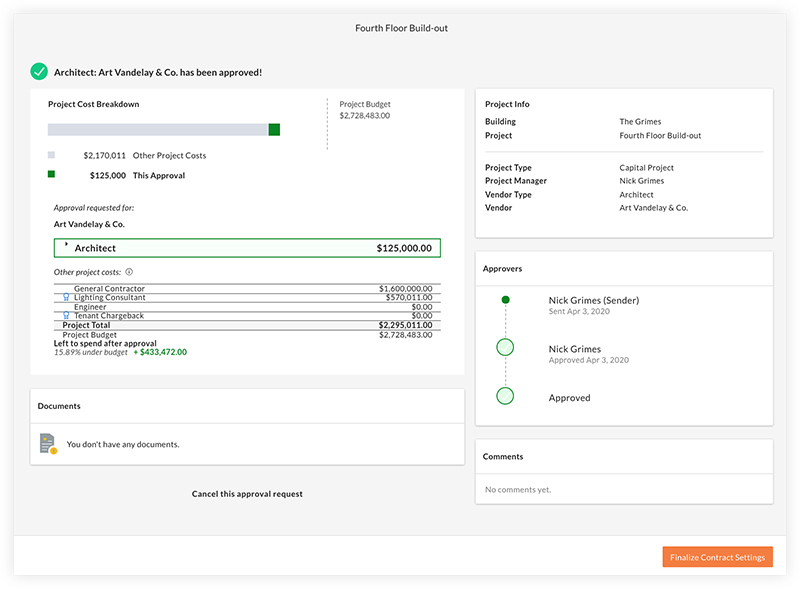
After the contract is finalized, you will be directed to the Contract Room portal—the two-way interface where your vendor will upload invoices and change orders.