Add a Drawing Area
Objective
Add a drawing area to manage and separate drawings for different buildings.
Background
 When uploading drawings for a project with multiple buildings, you might find that many drawings are labeled with the same number (for example, A1). To prevent confusion, you can create different drawing areas, where each building can have its own separate section within the project's Drawings tool. The ability to create separate drawing areas within a project makes it easier to navigate within the Drawings tool to find the correct drawings, even when there are multiple drawings with the same title or number. When the Drawing Areas feature is enabled and configured for a project, you can click into the designated drawing area to see drawings associated only with that building.
Things to Consider
- Required User Permissions:
- 'Admin' level permissions on the project's Drawings tool.
- Additional Information:
- Before you can add drawing areas to a project, you must first enable the Drawing Areas setting. See Enable or Disable Drawing Areas.
- If you previously uploaded drawings to a project before the drawings by area feature was enabled for the project, the existing drawings will be added to a drawing area called 'Area 01' by default. However, you can then edit the area's name and add additional drawing areas as necessary.
- Users who subscribe to drawings will receive email notifications for all drawings across all drawing areas.
Steps
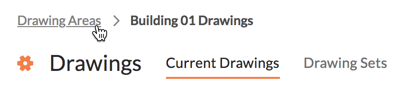
- Navigate to your project's Drawings tool.
- Click the Drawings Area link.
- Click the + Add Drawing Area button.

- Enter a name for the new drawing area.
Note: It's recommended that you name the drawing area so that it matches the name of the related building/structure. - Click Create.
- Optional: Upload drawings into the correct drawing area.