Integration by Procore: Accept or Reject a Project for Export to Viewpoint® Spectrum®
Objective
To accept or reject a new project created in Procore as an accounting approver. Upon acceptance, the project is then exported from Procore and added to Viewpoint® Spectrum® as a new 'Job.'
Background
If a user sends a Procore project to the ERP Integrations tool for acceptance by an accounting approver, the approver has the option to 'Accept' or 'Reject' the project for export to Spectrum as follows:
- Accept. An 'Accept' response exports the project from Procore and creates a new 'Job' in your Spectrum system.
OR - Reject. A 'Reject' response removes the project from the ERP Integrations tool's 'Ready to Export' list and places it into an editable state in the project's Admin tool for updating (see Add or Edit General Project Information).
If there is at least one (1) item awaiting accounting acceptance in the ERP Integrations tool's 'Ready to Export' view, users who have been granted the privilege detailed above will receive one automated email notification perday (e.g., with the Subject Line "ERP Integrations Daily Summary) until all of the in the 'Ready to Export' view have been accepted or rejected.
Things to Consider
- Required User Permissions:
- Prerequisites:
- Complete the steps in Add a Procore Project to Spectrum.
- Additional Information:
- To export a project from Procore, it must include these required fields: Division, Custom, Price Type, and Taxable (must be YES or NO).
Steps
Accept a Project for Export
- Navigate to the company's ERP Integrations tool.
- Click Jobs.
- Under Filters, click Ready to Export.
- Find the project to export.
- Choose the Accept option.
- In the Select a Job Template list, choose the desired template.
Note: By default, Procore displays all of your Viewpoint® Spectrum® projects in this list. If you would like to reduce the number of options in the Select a Job Template list, see How do I select which Viewpoint® Spectrum® jobs appear in the Select a Job Template list of the ERP Integrations tool? - Enter the Spectrum Job ID in the box provided.
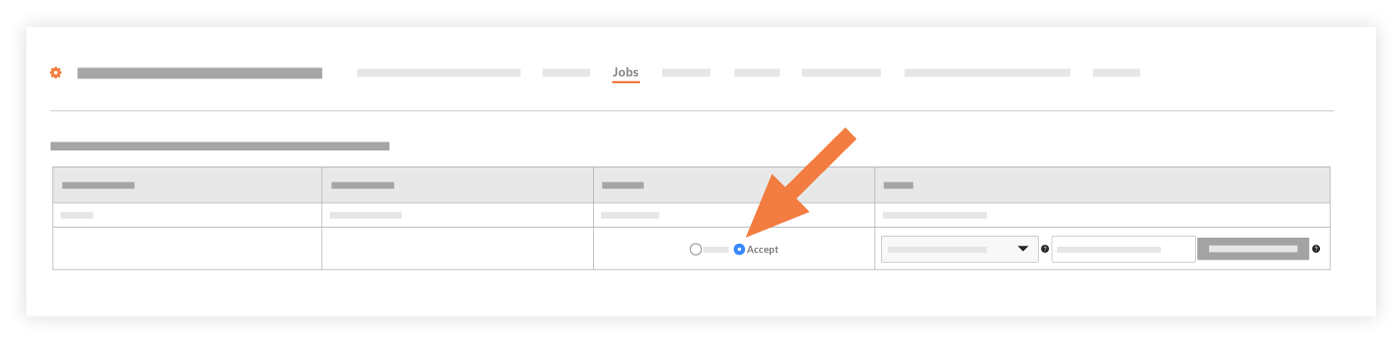
- Click Export to Spectrum.
This exports the project to Spectrum. The process typically takes a few minutes. A message appears to inform you of the sync status.
(Notes:- If for any reason a project (or another item) fails to export to the integrated ERP system, you can view the failed item(s) by clicking Failed to Export in the right pane.
- If the project fails to export, follow the step for rejecting the budget.
- If you want to confirm that the export was successful, log into the integrated ERP system and verify that your data appears as expected).
Reject a Project from Export
- Navigate to the company's ERP Integrations tool.
- Click Jobs.
- Under Filters, click Ready to Export.
- Reject the project to export.
- Choose the Reject option.
- Provide a reason for the rejection in the Enter a Comment box.

- Click Reject.
This rejects the project and it is not imported into the integrated ERP system. You can now make the appropriate changes in the project. See Add or Edit General Project Information.